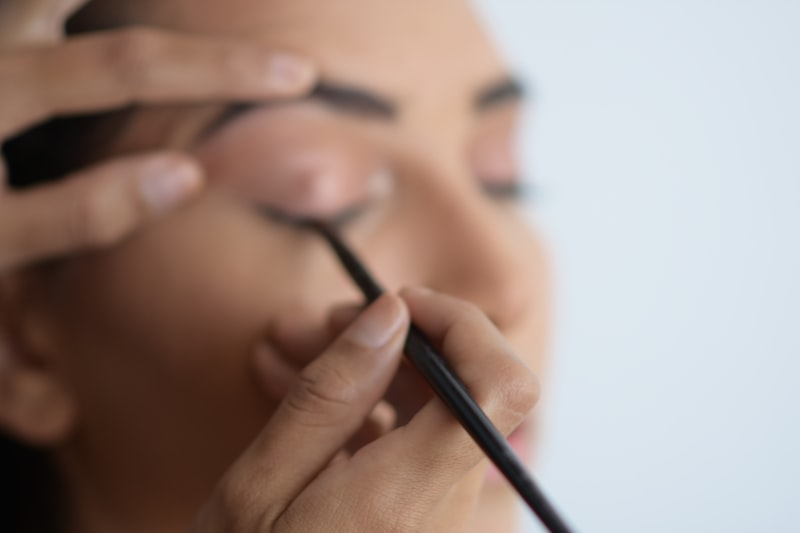
How to Get Perfect Winged Eyeliner Every Time
A step-by-step guide to consistent, symmetrical winged eyeliner — the technique, tool choice, and fixes for the most common mistakes.
By Rita Almusa, Licensed Master Esthetician — 20+ years of experience
Introduction
Winged eyeliner is one of the most requested — and most avoided — makeup techniques, mostly because a lot of people had one bad experience with a wobbly wing and decided it just wasn’t for them. The truth is winged liner is entirely learnable with the right approach, and it comes down to a handful of specific techniques rather than natural talent or a steady hand alone.
Why Winged Liner Feels So Hard
Most winged liner attempts go wrong for one of two reasons: trying to draw the wing in a single continuous stroke without a guide, or applying liner while pulling the eyelid taut, which distorts the eye’s natural shape and creates a line that looks wrong once you release the skin. Both problems have straightforward fixes once you know what’s actually happening.
Choosing the Right Liner Formula
- Liquid liner gives the most precise, defined line and is the standard choice for a crisp wing, but it has the least room for correction once applied.
- Gel liner with an angled brush offers more control and a softer application than liquid, with slightly more forgiveness for beginners.
- Pencil liner is the most forgiving option to practice with, since it can be smudged and adjusted more easily, though it typically doesn’t create as sharp a wing as liquid or gel.
If you’re just learning, starting with a gel or pencil formula before moving to liquid liner makes the learning curve considerably gentler.
Step-by-Step Tutorial
1. Prep Your Lid
Apply a light layer of eyeshadow primer or a thin layer of translucent powder over your lid. This helps liner glide on more smoothly and improves how long it wears throughout the day.
2. Find Your Natural Wing Angle
Look at the natural angle formed by your lower lash line extended outward — this is generally the most flattering angle to follow for your wing, rather than an arbitrary steep or shallow angle that doesn’t match your eye shape.
3. Map the Wing With Small Dots First
Rather than committing to one continuous stroke, place a few small dots along your intended wing line — from the outer corner of your eye extending toward your brow tail. This gives you a guide to connect rather than freehanding the whole shape at once.
4. Connect the Dots With Short Strokes
Fill in between your guide dots with short, light strokes rather than one long sweeping motion. Short strokes are easier to control and correct if one section goes slightly off.
5. Fill In the Wing Shape
Once your outline is connected, fill in the triangular shape between the wing and your natural lash line to create a solid, clean wing rather than just an outline.
6. Connect the Wing to Your Lash Line
Draw your liner along your upper lash line, working from the inner corner outward to meet the base of your wing, thickening slightly as you move toward the outer corner.
7. Check and Correct With a Flat Concealer Brush
Use a small, flat concealer brush dipped in concealer to clean up any uneven edges along the top and bottom of your wing, which sharpens the whole line without needing to redo it.

The Beauty Tips Guide
20+ years as a Licensed Master Esthetician and Makeup Artist, condensed into one guide.
Common Mistakes to Avoid
- Pulling your eyelid taut while applying liner. This distorts your natural eye shape, and the line you draw while stretched often looks wrong once you release the skin back to its natural position.
- Trying to draw the whole wing in one stroke. This is the fastest path to a wobbly, uneven line — break it into a guide and short connecting strokes instead.
- Making both eyes’ wings before checking symmetry. Do one wing, check it against your face, then start the second rather than committing to both blind.
- Using a liner formula that’s too advanced for your current comfort level. If liquid liner keeps going wrong, step back to gel or pencil until your hand-eye coordination for the shape improves.
Achieving Symmetry Between Both Eyes
Perfect symmetry is genuinely difficult even for professionals, and it’s worth knowing that most faces aren’t perfectly symmetrical to begin with — a slight difference between your two wings is far more noticeable to you than to anyone else. That said, using the same guide-dot method on both sides, and stepping back to compare from a distance (not just up close in the mirror) rather than side by side, helps catch and correct any major discrepancy before you finish.
Troubleshooting Common Problems
My wing looks thick and blocky instead of sharp. This usually comes from filling in too much space between your guide dots too quickly. Slow down, use a thinner brush or liner tip, and build the shape gradually rather than all at once.
One wing is noticeably higher than the other. Compare both from a distance, not just up close, and remember that a completely identical match is genuinely difficult — small differences read as far less obvious to others than they do to you in the mirror.
My liner smudges or transfers under my eye throughout the day. This is often an eyelid oil issue rather than a formula issue — try a lightweight, mattifying eye primer underneath, especially if you have naturally oily eyelids.
Pro Tips
- Look straight ahead into the mirror, not down, while applying liner — looking down changes the shape of your lid and can throw off your line.
- Use tape or a card as a guide angled from your lower lash line to your brow if you’re really struggling with a consistent angle.
- Let liquid liner dry fully before opening your eyes wide to check it, since fresh liner can transfer or smudge onto your lid if touched too soon.
- Practice on days with no time pressure — winged liner improves with repetition, and rushing while learning tends to reinforce bad habits rather than build good ones.
Frequently Asked Questions
What’s the easiest liner formula for a total beginner? A gel liner with a small angled brush tends to offer the best balance of control and precision for people just starting to learn winged liner.
How do I fix a mistake without removing all my eye makeup? A cotton swab dipped in micellar water or gentle makeup remover, used precisely on just the liner mistake, lets you correct small errors without disturbing your eyeshadow underneath.
Does eye shape affect how a winged liner should be applied? Yes — the ideal wing angle and thickness vary somewhat by eye shape. Following your own lower lash line’s natural angle, rather than copying an angle that works on someone else’s different eye shape, generally gives the most flattering result for your specific eyes.
Conclusion
Winged eyeliner is a skill, not a talent you either have or don’t — breaking the wing into a guide, short connecting strokes, and a cleanup step makes it achievable for genuinely anyone willing to practice. Give yourself permission to have an uneven first few attempts; like any precise technique, it gets faster and steadier the more you do it. ✨
Related Posts

This Fall Makeup Look Works on Everyone: A Get-Ready-With-Me Tutorial
A versatile, easy fall makeup look that flatters every skin tone and eye shape — a full get-ready-with-me tutorial from base to lips.

Eyeshadow Tutorial for Beginners: How to Create a Soft Fox Eye Look
A beginner-friendly, step-by-step eyeshadow tutorial for the popular fox eye look — blending technique, placement, and the mistakes that ruin it.
How to Use Setting Powder: The Baking Technique for Flawless, Long-Lasting Makeup
Learn how to set your foundation and concealer with powder, plus the baking technique for makeup that lasts all day without creasing or looking cakey.
How to Get Anime-Inspired Lashes With Just Mascara
A Certified Makeup Artist's mascara tutorial for the trendy anime-inspired lash look — long, dramatic, wide-set lashes without falsies or extensions.