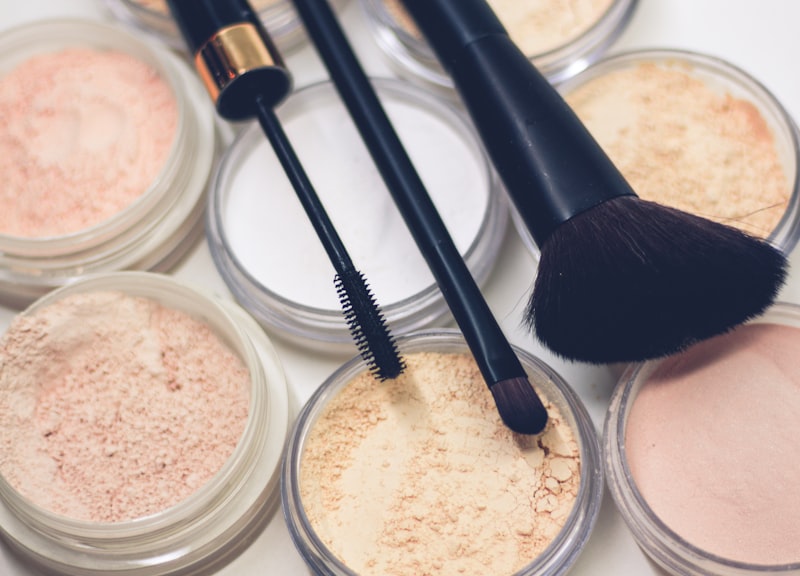
How to Use Setting Powder: The Baking Technique for Flawless, Long-Lasting Makeup
Learn how to set your foundation and concealer with powder, plus the baking technique for makeup that lasts all day without creasing or looking cakey.
By Rita Almusa, Licensed Master Esthetician — 20+ years of experience
Introduction
Once you’ve settled on your foundation application tool of choice, the next step that makes the biggest difference in how long your makeup actually lasts is setting powder. It’s the step people skip most often, and it’s also the reason foundation that looked perfect in the mirror at 8am looks creased, oily, or patchy by 2pm. This guide covers both basic setting and the baking technique for serious longevity.
Why Setting Powder Matters
Foundation and concealer are both formulated with some amount of moisture and oil to help them blend smoothly. That’s great for application, but it also means they naturally shift throughout the day — settling into fine lines, sliding on oily areas, and losing their finish. A translucent or color-matched setting powder locks the makeup underneath in place, absorbing excess oil and creating a barrier that resists movement and creasing.
Setting vs. Baking: What’s the Difference?
Setting is a light dusting of powder applied all over, or targeted to specific oily/crease-prone areas, to lock everything in place without adding visible coverage.
Baking is a more intense technique where you apply a much heavier layer of powder to specific areas — usually under the eyes, down the center of the face, and around the nose — and let it sit for several minutes before dusting off the excess. The extended contact time lets the powder absorb more oil and set concealer more thoroughly, which is why it’s the go-to technique for special occasions or long days where you need makeup to hold for hours longer than a normal setting routine.
Choosing the Right Powder
Not all setting powders behave the same way, and the wrong choice can undo good foundation work:
- Translucent powder has no added pigment and is the most versatile option — it works across skin tones and is the standard choice for baking, since the goal is to dust it off rather than leave visible coverage.
- Color-matched (tinted) powder adds a small amount of extra coverage while setting, which can be useful for all-over regular setting but isn’t necessary for baking.
- Pressed vs. loose powder. Loose powder is generally better for baking, since it’s easier to apply a thick, even layer with a sponge. Pressed powder works fine for light, everyday setting with a brush.
- Finish matters too. A finely milled powder gives the most natural result; heavier, chalkier formulas are more likely to look cakey, especially on drier skin.
Step-by-Step: Basic Setting
1. Apply Foundation and Concealer First
Make sure your base is fully blended before you add any powder — powder should lock in finished makeup, not be used to fix blending issues.
2. Use a Fluffy Brush, Not a Sponge
Dip a fluffy powder brush into translucent or color-matched powder, tap off the excess, and press it lightly into the skin rather than swiping.
3. Focus on the T-Zone
Oil accumulates fastest around the forehead, nose, and chin. If you have normal to dry skin elsewhere, you can skip powder on the cheeks entirely to avoid a flat, powdery look.
4. Set Under the Eyes
A light layer under the eyes prevents concealer from creasing into fine lines as the day goes on — this is one of the most common trouble spots.
Step-by-Step: The Baking Technique
1. Apply Concealer Generously
Apply a slightly heavier-than-usual layer of concealer under the eyes and anywhere else you want extra staying power.
2. Press On a Heavy Layer of Powder
Using a damp sponge, press (don’t swipe) a thick layer of loose powder over the concealed areas. It should look noticeably heavier than a normal setting layer.
3. Let It Sit
This is the step that makes baking different from regular setting — leave the powder in place for five to ten minutes. Use this time to finish the rest of your makeup (eyes, brows, lips) while the powder absorbs oil and sets the concealer underneath.
4. Dust Off the Excess
Once the time is up, use a large fluffy brush to sweep away all the excess powder. The result should look natural, not cakey — if it looks heavy at this stage, you haven’t dusted off enough.

The Beauty Tips Guide
20+ years as a Licensed Master Esthetician and Makeup Artist, condensed into one guide.
Common Mistakes to Avoid
- Using too much powder all over the face. Over-powdering, especially on drier areas, is the number one cause of a flat, cakey look.
- Applying powder with a sponge instead of a brush for regular setting. Sponges are better for baking’s heavy press; a fluffy brush is better for light, even setting.
- Skipping the wait time when baking. The extended sit time is what makes baking effective — dusting it off immediately defeats the purpose.
- Using the wrong shade of powder. A powder that’s too light can look ashy or ghostly in photos, especially with flash.
Troubleshooting Common Problems
My baked makeup looks patchy after I dust off the powder. This usually means the powder wasn’t left on long enough, or too little was applied to begin with. Make sure you’re using a genuinely heavy layer and the full five-to-ten minute wait time.
My skin looks flat and powdery, not natural. You’re likely over-powdering areas that don’t need it. Stick to baking only where you actually need extra hold — under the eyes, around the nose — rather than the whole face.
Concealer still creases even after baking. Check whether you’re applying enough concealer to begin with, and whether your under-eye area is well-moisturized before you start. Baking sets what’s there — it can’t compensate for a concealer formula that’s too dry or too thin for the area.
The powder looks gray or ashy in photos. This is common with the wrong shade or a powder with too much light-reflecting particles for flash photography. A finely milled, truly translucent powder tends to photograph better than a heavily tinted one.
Which One Should You Use?
For a normal day, regular setting is enough — a light dusting keeps makeup in place without adding extra time to your routine. Save baking for occasions where you genuinely need extra longevity: long events, hot weather, or anytime you know you won’t be able to touch up during the day. Baking is also particularly useful for photos and video, since the intensified setting helps prevent flashback and keeps concealer from creasing under studio lighting.
Pro Tips
- Translucent powder works on every skin tone for baking, since it’s meant to be dusted off rather than left as visible coverage.
- Press, don’t swipe, when baking — swiping motion can drag concealer out of place before it’s had time to set.
- A damp (not soaking) sponge picks up powder best for the baking technique’s heavier application.
- Touch up with powder, not more foundation, if you get oily midday — adding foundation on top of set makeup often looks patchy.
Frequently Asked Questions
Will setting powder make my skin look older by settling into fine lines? Using too much powder, or the wrong texture, can emphasize texture and fine lines. A finely milled, lightweight powder applied only where needed avoids this — heavy-handed application anywhere is usually the real culprit.
Can I bake if I have dry skin? Yes, but be more selective about where you bake and make sure your skin is well-moisturized underneath. Baking works by absorbing oil, so on very dry skin it’s worth using it only on your under-eye area rather than all over.
Do I need a special brush to dust off baked powder? A large, fluffy, soft-bristled brush works best — it sweeps away excess powder without disturbing the makeup underneath. A smaller or stiffer brush can drag product rather than lift it away cleanly.
How is baking different from just using more concealer? More concealer alone doesn’t add oil control or longevity — it just adds coverage. Baking’s real value is the powder’s extended contact time absorbing oil and locking the concealer in place, which more product alone can’t replicate.
Conclusion
Setting powder is one of the simplest additions to a makeup routine, and it makes a bigger difference in how your makeup holds up than almost any other single step. Start with basic setting for everyday wear, and save the baking technique for days when you genuinely need extra staying power. Watch the full tutorial above to see both techniques in action, and don’t be afraid to experiment with how much powder your skin actually needs — it’s different for everyone. ✨
Related Posts
This Fall Makeup Look Works on Everyone: A Get-Ready-With-Me Tutorial
A versatile, easy fall makeup look that flatters every skin tone and eye shape — a full get-ready-with-me tutorial from base to lips.
How to Get Perfect Winged Eyeliner Every Time
A step-by-step guide to consistent, symmetrical winged eyeliner — the technique, tool choice, and fixes for the most common mistakes.
Eyeshadow Tutorial for Beginners: How to Create a Soft Fox Eye Look
A beginner-friendly, step-by-step eyeshadow tutorial for the popular fox eye look — blending technique, placement, and the mistakes that ruin it.
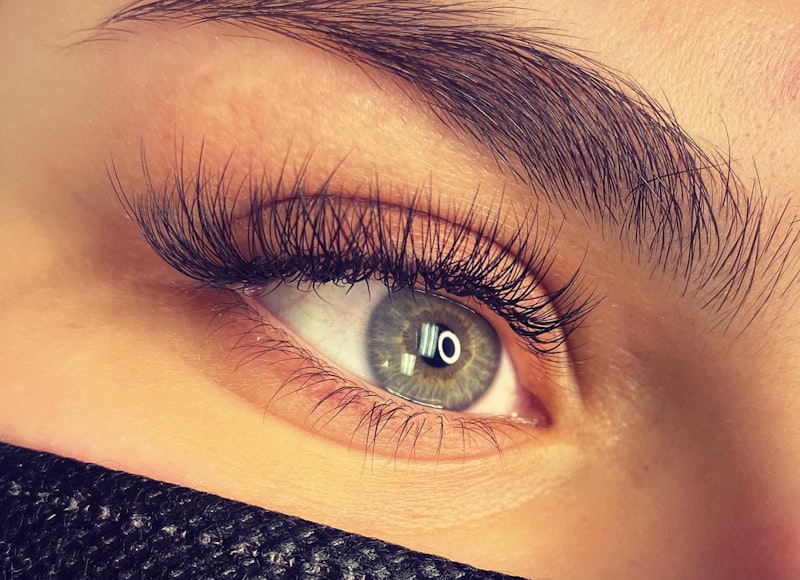
How to Get Anime-Inspired Lashes With Just Mascara
A Certified Makeup Artist's mascara tutorial for the trendy anime-inspired lash look — long, dramatic, wide-set lashes without falsies or extensions.